Contents
Intro
In this blog post, we’ll be talking about what exactly MJML is, why it is an awesome tool for creating slick looking emails, how to build MJML templates during the Elixir compilation phase, and how we go about sending these beautiful emails using Swoosh. In order to make this a bit more real world, we’ll also be leveraging Phx.Gen.Auth and will craft a great looking welcome email to ensure our new users feel extra welcome to our new SaaS platform ;).
Without further ado, let’s dive right into things!
What is MJML?
MJML (https://mjml.io/) is a responsive email framework that ensures your emails are responsive and look consistent across the various email clients. If you thought that cross browser render parity was an issue…email client compatibility is an even bigger nightmare. MJML takes that headache away and allows you to craft slick looking emails in a few lines of XML markup. If you look at the MJML documentation (https://mjml.io/documentation/#components), you’ll also see that there are plenty of included components to help get you on your way.
After you have created your MJML template, you’ll need to go through a compilation step to convert that MJML template into a valid HTML document for email clients to render. If you want to use the 1st party tooling, you can download and use the NPM MJML (https://www.npmjs.com/package/mjml) package to convert MJML documents to HTML documents. In this post though, we’ll be leveraging a slightly different tool given that we don’t want to add any additional complexity to our build pipeline and would like it to be as streamlined as possible (i.e all operations take place in Elixir land).
Show me the code!
In order to perform all of our MJML compilation steps in the context of an Elixir compilation, we’ll be using the Elixir package https://github.com/adoptoposs/mjml_nif that actually wraps a Rust MJML library using Rustler (if that doesn’t have all the buzzwords required to get to the top page of HackerNews…I don’t know what does). For your FYI, the Rust MJML library that mjml_nif wraps is called mrml (https://github.com/jdrouet/mrml). Once mjml_nif converts the MJML template to an HTML document, we’ll then leverage an EEx macro to dynamically generate a function in a module using that compiled MJML document. We’ll also add an attribute to our module to hint to the Elixir compiler that our module needs to be recompiled any time the MJML file changes since our EEx macro will depend on that external file. While this all may sound a bit confusing, keep reading and you’ll actually see that we can accomplish all of this in less than 20 lines of code! With that all being said, let’s jump right into it!
Step 1: Create a new Phoenix project and install dependencies - commit
Install the Phoenix project generator (if you don’t already have it installed) by running:
$ mix archive.install hex phx_new 1.5.7
With that done and in place, we’ll want to generate a new Phoenix project. You can replace mjml_demo with what ever
you want to call your project and can also re-enable generator features as you see fit. Run the following to generate
your project:
$ mix phx.new mjml_demo --no-webpack
Once your project is created, open up your mix.exs file and modify your deps/0 function as follows:
def deps do
  [
    ...
    {:hackney, "~> 1.9"},
    {:swoosh, "~> 1.1.2"},
    {:mjml, "~> 0.2.0"},
    {:phx_gen_auth, "~> 0.6.0", only: :dev}
  ]
end
With all that in place go ahead and run mix deps.get to fetch all of your dependencies. Now on to setting up
Phx.Gen.Auth (in Phoenix 1.6 you won’t have to do this separately as the authentication generator has been ported over
to Phoenix itself
https://github.com/phoenixframework/phoenix/pull/4077)!
Step 2: Setting up Phx.Gen.Auth - commit
Next, in a terminal session, we’ll run the Phx.Gen.Auth Mix Task to generate all of our authentication boilerplate.
Given that this will also compile our application and dependencies, we’ll need to ensure that a valid Rust compiler is
available in our PATH environment variable. For that purpose, I recommend setting up asdf. I personally use asdf for
all my run-time versioning needs but do pick whatever works best for you :). You can get more information and set up
instructions on asdf and the asdf Rust plugin from the following links: https://github.com/asdf-vm/asdf and
https://github.com/code-lever/asdf-rust.
With that out of the way, let’s run the following:
$ mix phx.gen.auth Accounts User users --binary-id
Once that completes, you’ll want to run the following terminal commands as Phx.Gen.Auth needs to fetch some dependencies
that were injected into your mix.exs file and also needs its database migrations run (make sure you have a Postgres
instance running somewhere):
# If you need to start up Postgres, run the following in a separate terminal
$ docker run -p 5432:5432 -e POSTGRES_PASSWORD=postgres postgres:12

$ mix deps.get
$ mix ecto.setup
With that in place, we’re ready to configure Swoosh. Let’s get to it!
Step 3: Configuring Swoosh - commit
Let’s start off by creating a directory that will act as our “email” context. In this directory we will house all the
MJML templates, and their EEx module counterparts so that everything is nicely organized. Will call this directory
emails and we’ll create it at lib/mjml_demo/emails/. Next we’ll create a module at lib/mjml_demo/emails.ex that
will act as the entry point into our emails context. Our MjmlDemo.Emails module will have the following contents:
defmodule MjmlDemo.Emails do
  use Swoosh.Mailer, otp_app: :mjml_demo

  import Swoosh.Email

  alias __MODULE__.ConfirmationInstructions

  def confirmation_instructions(user, confirmation_url) do
    # You'll want to update the User schema and the DB migration to support
    # storing first+last names, plan tiers, and whatever else you want to
    # associate to the user registration.
    rendered_email =
      ConfirmationInstructions.render(
        first_name: "Agent",
        last_name: "Smith",
        confirmation_url: confirmation_url,
        tier: "Gold"
      )

    new()
    |> to(user.email)
    |> from({"Onboarding Team", "welcome@saas-central.com"})
    |> subject("Welcome to SaaS-Central!")
    |> html_body(rendered_email)
    |> text_body("""
    Hello Agent Smith and thank you for signing up for the Gold plan!!!

    You can confirm your account by visiting the following URL: #{confirmation_url}
    """)
    |> deliver()
  end

  def generate_template(file_path) do
    {:ok, template} =
      file_path
      |> File.read!()
      |> Mjml.to_html()

    ~r/{{\s*([^}^\s]+)\s*}}/
    |> Regex.replace(template, fn _, variable_name ->
      "<%= @#{variable_name} %>"
    end)
  end
end
You’ll notice that we have hard coded a couple of things for our EEx template, mostly because I want to keep this
tutorial laser focused and not jump around between lots of files. But if you do want to update the Phx.Gen.Auth
generated files to support those additional fields, feel free to do so! We also have a function generate_template/2
that will take a file path, compile the MJML template using mjml_nif, and will then do some last mile tweaking of the
template. The Rust MJML parser for whatever reason has issues parsing the file when the EEx template construct <%= %>
is present in the template. As a result, we’ll be using the handlebars syntax {{ }} to denote that something
references an assigns variable, and then through some excellently crafted RegEx, we’ll replace everything that looks
like {{ first_name }} with <%= @first_name %>. Hopefully as the Rust mrml project matures, this will no longer be
necessary.
Next, we’ll need to update our config/dev.exs file to ensure that our Swoosh module is configured to work with the
local testing adapter as opposed to a real SaaS solution like SendGrid or Mandrill. Add the following entry to your
dev.exs file:
config :mjml_demo, MjmlDemo.Emails, adapter: Swoosh.Adapters.Local
And also add the following to your lib/mjml_demo_web/router.ex file so that the mailbox can be accessed during
development and only during development. When your project is compiled with MIX_ENV=prod this route will not be
accessible.
if Mix.env() == :dev do
  scope "/dev" do
    pipe_through [:browser]

    forward "/mailbox", Plug.Swoosh.MailboxPreview, base_path: "/dev/mailbox"
  end
end
Step 4: Compiling our MJML templates and notifying the user - commit
At the top of the MjmlDemo.Emails module you’ll notice see that we make use of the ConfirmationInstructions module.
Let’s add that module at lib/mjml_demo/emails/confirmation_instructions.ex with the following contents:
defmodule MjmlDemo.Emails.ConfirmationInstructions do
  @template_path Path.join([__DIR__, "confirmation_instructions.mjml"])
  @external_resource @template_path

  require EEx

  alias MjmlDemo.Emails

  rendered_mjml = Emails.generate_template(@template_path)
  EEx.function_from_string(:def, :render, rendered_mjml, [:assigns])
end
Let’s take some time to unpack this as this is where all the magic happens! The first attribute that we define,
@template_path, states that our MJML template will reside adjacent to this module (thanks to the __DIR__ special
form function). Next, we mark the module as having an external resource dependency on that file. This hints to the
Elixir compiler that this module needs to be recompiled if the associated MJML template ever changes (huge thanks to
@sorentwo for pointing me in the right direction on this one). This allows us to change
our MJML template without worrying about having to manually recompile or update everything. No external tooling
required, it’s all part of the Elixir compilation process now! Lastly, we leverage our generate_template/1 helper
function to read the file, convert our handlebars syntax to EEx, and then using the function_from_string/4 macro, we
generate a render/1 function in the MjmlDemo.Emails.ConfirmationInstructions that we will call in order to generate
our email. Hopefully that all made sense…if not leave some comments down below!
With that in place, let’s create an MJML template at lib/mjml_demo/emails/confirmation_instructions.mjml with the
following contents:
<mjml>
  <mj-body background-color="#ffffff">
    <mj-section background-color="#ffffff" padding-bottom="0px" padding-top="0">
      <mj-column vertical-align="top" width="100%">
        <mj-image src="https://images.unsplash.com/photo-1527247043589-98e6ac08f56c?width=600&crop=fit" align="center" border="none" width="600px" padding-left="0px" padding-right="0px" padding-bottom="0px" padding-top="0"></mj-image>
      </mj-column>
    </mj-section>
    <mj-section background-color="#009FE3" padding-bottom="0px" padding-top="0">
      <mj-column vertical-align="top" width="100%">
        <mj-text align="left" color="#ffffff" font-size="36px" font-weight="bold" font-family="open Sans Helvetica, Arial, sans-serif" padding-left="25px" padding-right="25px" padding-bottom="10px" padding-top="50px">Welcome to SaaS-Central!</mj-text>
      </mj-column>
    </mj-section>
    <mj-section background-color="#009fe3" padding-bottom="20px" padding-top="20px">
      <mj-column vertical-align="middle" width="100%">
        <mj-text align="left" color="#ffffff" font-size="22px" font-family="open Sans Helvetica, Arial, sans-serif" padding-left="25px" padding-right="25px">
          <span style="color:#FEEB35">Dear {{ first_name }} {{ last_name }}</span>
        </mj-text>

        <mj-text align="left" color="#ffffff" font-size="20px" font-family="open Sans Helvetica, Arial, sans-serif" padding-left="25px" padding-right="25px" padding-top="20px">
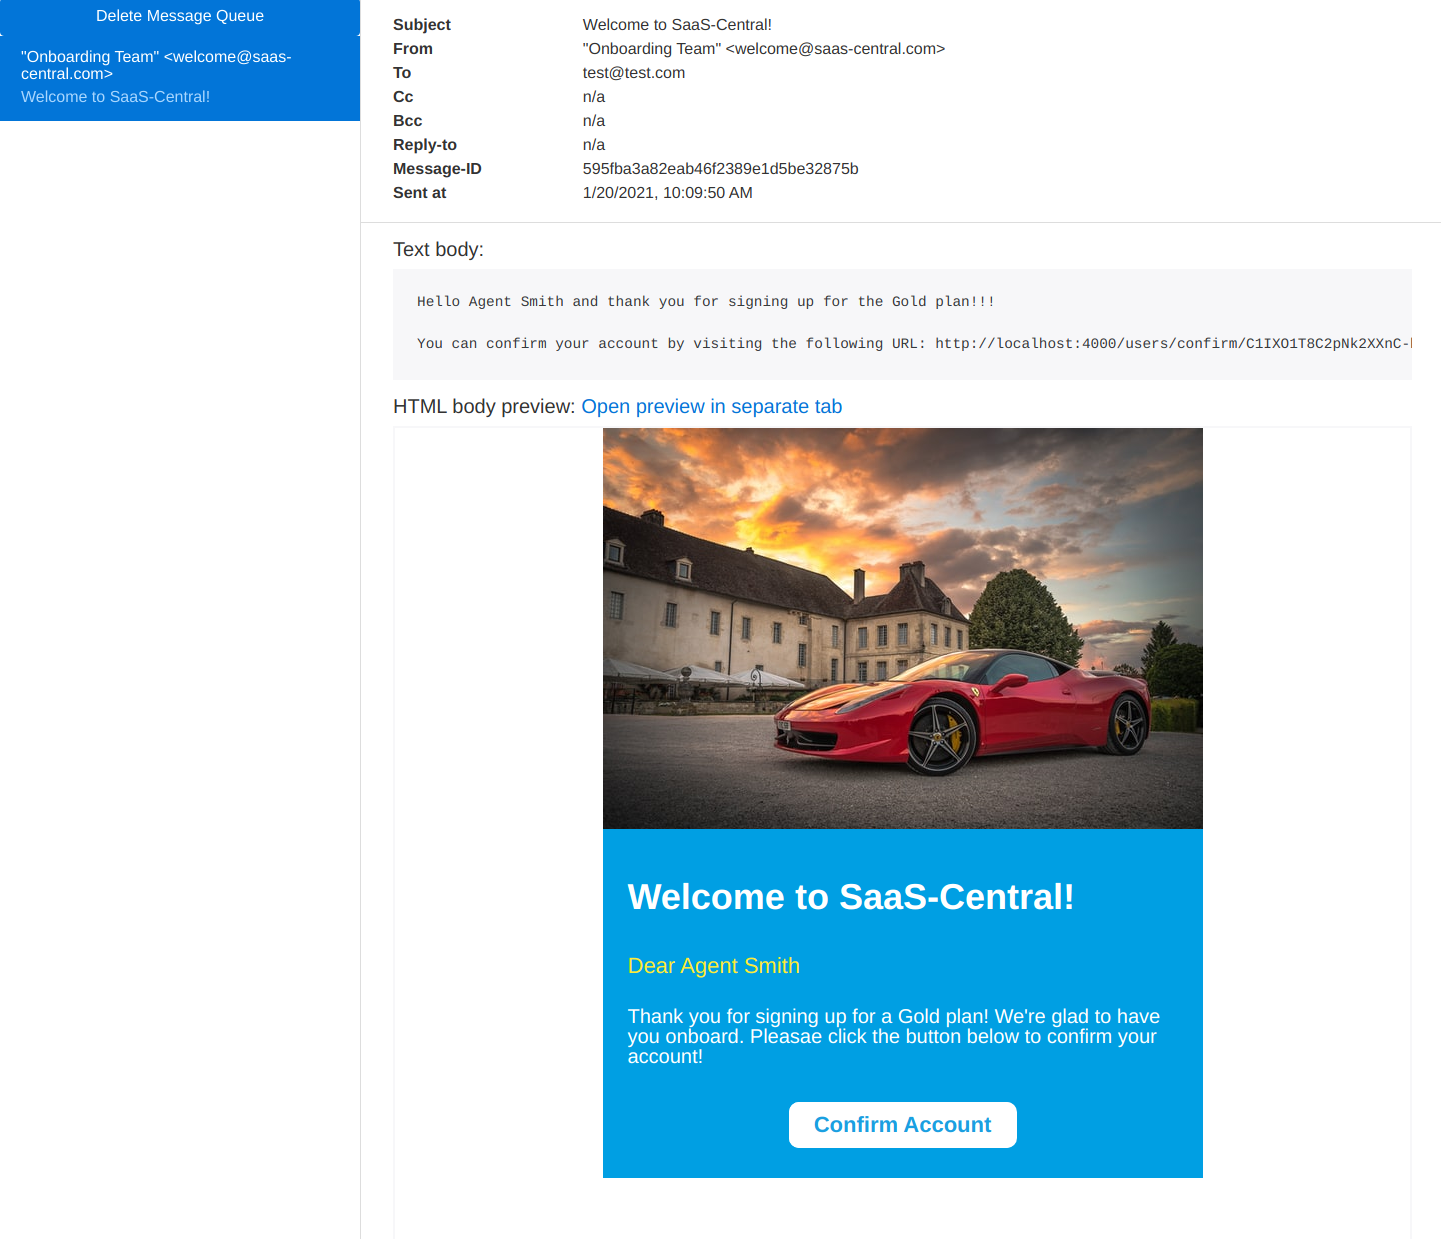
          Thank you for signing up for a {{ tier }} plan! We're glad to have you onboard. Please click the button below to confirm your account!
        </mj-text>
        <mj-button align="center" font-size="22px" padding-top="25px" href="{{ confirmation_url }}" font-weight="bold" background-color="#ffffff" border-radius="10px" color="#1AA0E1" font-family="open Sans Helvetica, Arial, sans-serif">
          Confirm Account
        </mj-button>
      </mj-column>
    </mj-section>
  </mj-body>
</mjml>
I won’t dive too much into this template and the MJML syntax, but do do checkout the great MJML documentation to see how you can create templates that meet your needs https://mjml.io/documentation/.
That last thing we need to do is to update our Phx.Gen.Auth code to leverage our new template. Luckily, Phx.Gen.Auth
provides the UserNotifier module found at lib/mjml_demo/accounts/user_notifier.ex which gives us enough of an
unopinionated skeleton to insert whatever suites our needs. To that end, let’s update the
deliver_confirmation_instructions/2 function to use our MjmlDemo.Emails.ConfirmationInstructions module that we
just put together:
def deliver_confirmation_instructions(user, url) do
  MjmlDemo.Emails.confirmation_instructions(user, url)
end
Step 5: Testing our user registration flow
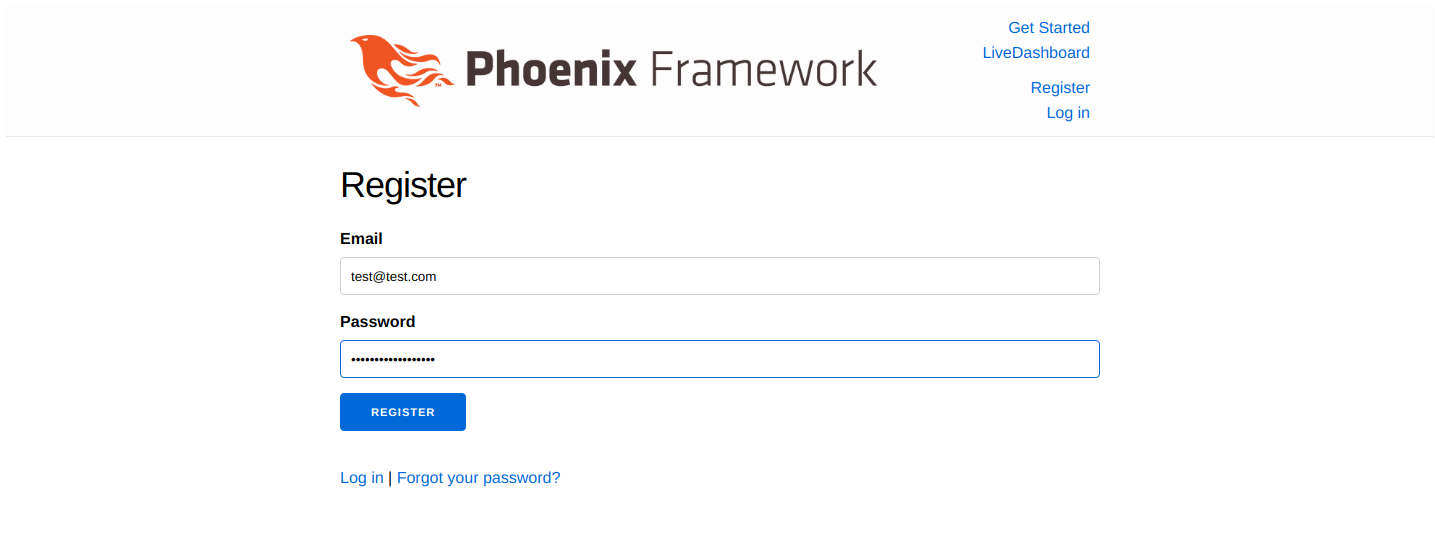
With all that done, let’s start up our Phoenix application and give this all a spin! Start the Phoenix application by
running mix phx.server and navigate to http://localhost:4000/users/register.

Once there, create a new account and then navigate to http://localhost:4000/dev/mailbox/ to see your rendered
email template!

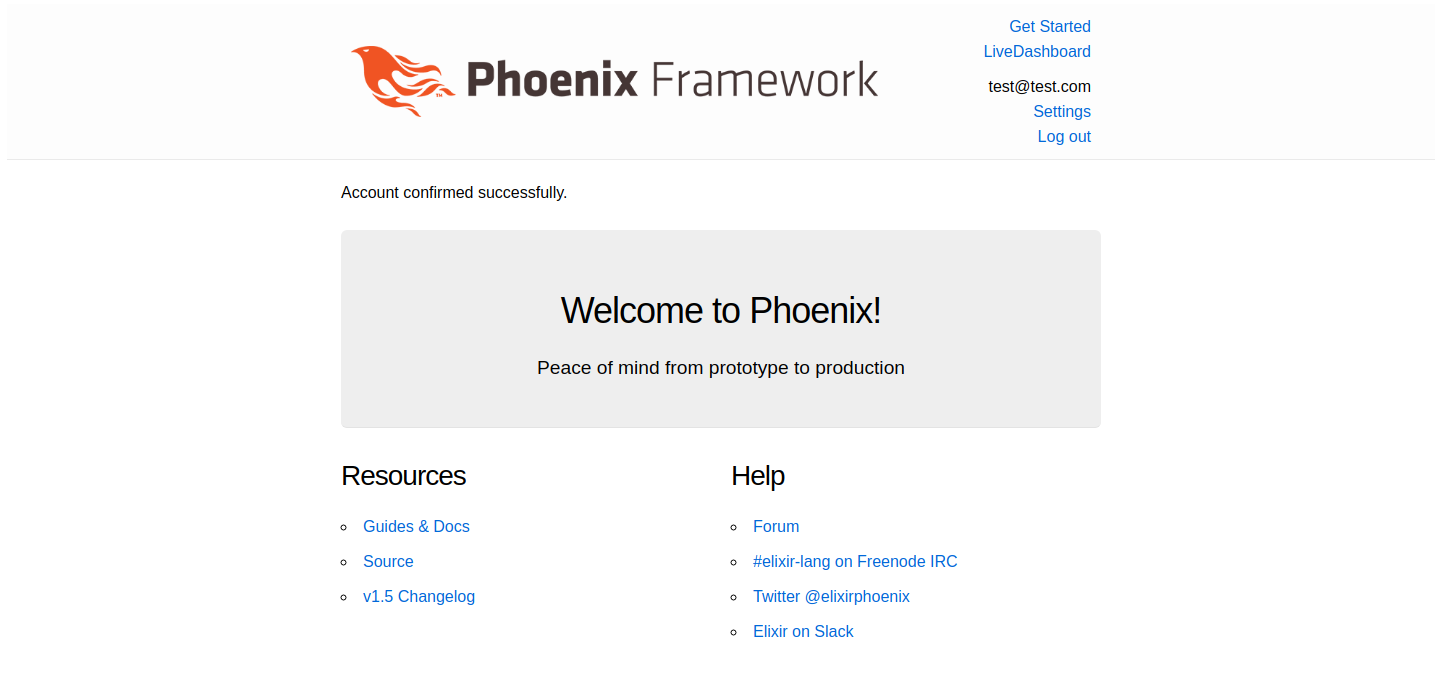
Finally, you can click on the Confirm Account button in the email and complete the Phx.Gen.Auth flow for confirming the user :).

Closing thoughts
Well done and thanks for sticking with me to the end! We covered quite a lot of ground and hopefully you picked up a couple of cool tips and tricks along the way. To recap, We set up a relatively simple flow of compiling MJML templates into EEx templates at compile time, and hooked up Swoosh with Phx.Gen.Auth to deliver confirmation emails to our users when they sign up.
Lastly, I want to thank @paulgoetze for his work on https://github.com/adoptoposs/mjml_nif as it has fixed a huge pain point for me and for that I am thankful!
Feel free to leave comments or feedback or even what you would like to see in the next tutorial. Till next time!
comments powered by Disqus